Can I Repair Foundation Myself? Here's What Actually Works
 Feb, 26 2026
Foundation Crack Assessment Tool
Is Your Foundation Crack Safe to Repair Yourself?
Answer these questions to see if your crack can be repaired DIY or if you need professional help.
Most homeowners panic when they see their first crack in the foundation. Maybe it’s a thin line near the garage door, or maybe it’s wide enough to stick a pencil in. Either way, the question pops up: Can I repair foundation myself? The short answer? Sometimes. But not always. And if you get it wrong, you could make things a lot worse.
When DIY Foundation Repair Might Work
Not all foundation problems are created equal. Small, non-structural cracks under 1/8 inch wide? Those are often just shrinkage cracks from concrete curing. They happen in nearly every new home, especially in places like Wellington where the soil shifts with seasonal rain. If the crack hasn’t grown in the last six months, isn’t leaking water, and doesn’t line up with sticking doors or uneven floors, it’s probably safe to seal it yourself.
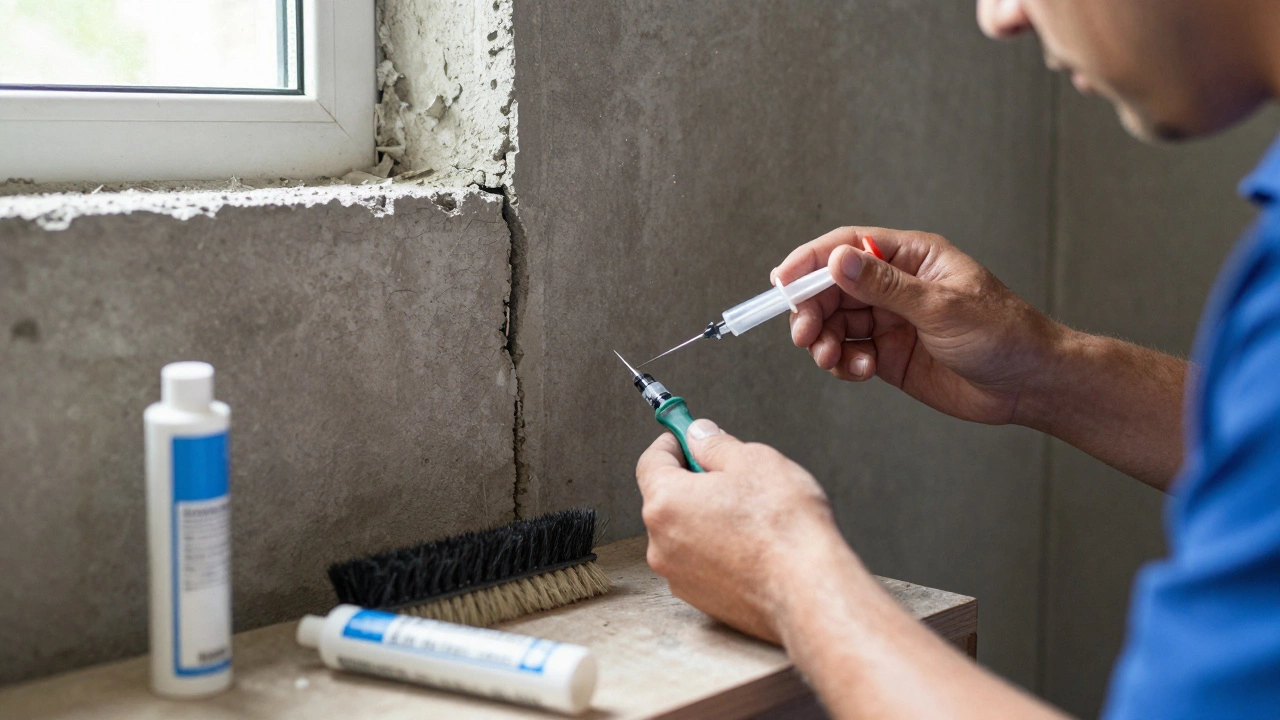
Here’s what you’ll need:
- Concrete crack filler (polyurethane or epoxy-based, not just caulk)
- Wire brush or angle grinder with a wire wheel
- Stiff-bristle brush
- Waterproofing sealant (silane/siloxane type)
- Protective gloves and goggles
Step one: Clean the crack. Remove loose debris, dirt, and any paint. Use the wire brush to open up the crack slightly so the filler can bond. Step two: Dry the area. Moisture is the enemy of any repair. Use a heat gun or let it sit in the sun for a full day. Step three: Inject the filler. Follow the product instructions. Most kits come with a syringe or cartridge gun. Fill from the bottom up. Step four: Seal the surface. Once the filler cures (usually 24-48 hours), apply a waterproofing sealant to the whole wall. This stops future water from creeping in.
These fixes work for surface cracks. They don’t fix sinking, shifting, or bowing walls. Those are different problems.
When You Absolutely Shouldn’t Try DIY
If your foundation shows any of these signs, stop. Call a pro.
- C cracks wider than 1/4 inch
- Stair-step cracks in brick or block walls
- Doors or windows that stick or won’t close
- Uneven floors that slope noticeably
- Cracks that are getting wider over time
- Water pooling in the basement or crawl space
These aren’t cosmetic. They mean the foundation is moving. In Wellington, soil types like clay and silt expand when wet and shrink when dry. That’s why houses here often settle unevenly. A 2-inch shift over 10 feet might not sound like much, but it puts enormous stress on walls, pipes, and framing. DIY epoxy can’t fix that.
One homeowner in Lower Hutt tried to fill a 1/2-inch crack with hydraulic cement. Six months later, the crack doubled in size. The wall was bowing inward. The repair cost tripled because the damage had spread to the floor joists.
What’s Really Going On Under Your House?
Foundation movement isn’t random. It’s caused by soil, water, or both.
Clay soil - common in many parts of Wellington - swells when it rains and hardens in summer. This constant push-pull can lift or drop sections of your foundation. Poor drainage? Water pooling near the foundation? That’s like giving your house a slow, soaking bath. Over time, the soil turns to mud and loses its support.
Older homes (built before 2000) often have shallow footings. Modern homes use deeper, reinforced footings. That’s why newer houses rarely have foundation issues - unless they’re built on bad soil or without proper drainage.
Even if your house looks fine, check the perimeter. Are gutters clogged? Are downspouts directing water away? Is the ground sloping toward the house? If yes, you’re setting yourself up for trouble.
Common DIY Mistakes (And Why They Backfire)
People think foundation repair is like patching drywall. It’s not.
- Using silicone caulk - It’s flexible, but it doesn’t bond to concrete. Water gets behind it, freezes, and pushes the crack open wider.
- Painting over cracks - Hides the problem. Lets it grow unnoticed. By the time you notice, the wall might be leaning.
- Only fixing one side - If one corner is sinking, the whole foundation is out of balance. Patching one crack without addressing the root cause is like putting a bandage on a broken bone.
- Ignoring the crawl space - Most foundation damage starts from below. Moisture, rotting wood, or termite damage in the crawl space can weaken supports long before cracks appear above.
One homeowner in Porirua spent $300 on a DIY kit. Two years later, he paid $18,000 to install steel piers after his living room floor dropped 3 inches. The crack he patched? It was just a symptom.
What Professional Foundation Repair Actually Looks Like
Professionals don’t just slap on filler. They diagnose.
First, they inspect the entire structure - not just the crack. They check for:
- Soil moisture levels (using probes)
- Drainage patterns around the house
- Footings and support beams
- Wood rot or pest damage in the crawl space
- Level of the floor using a laser level
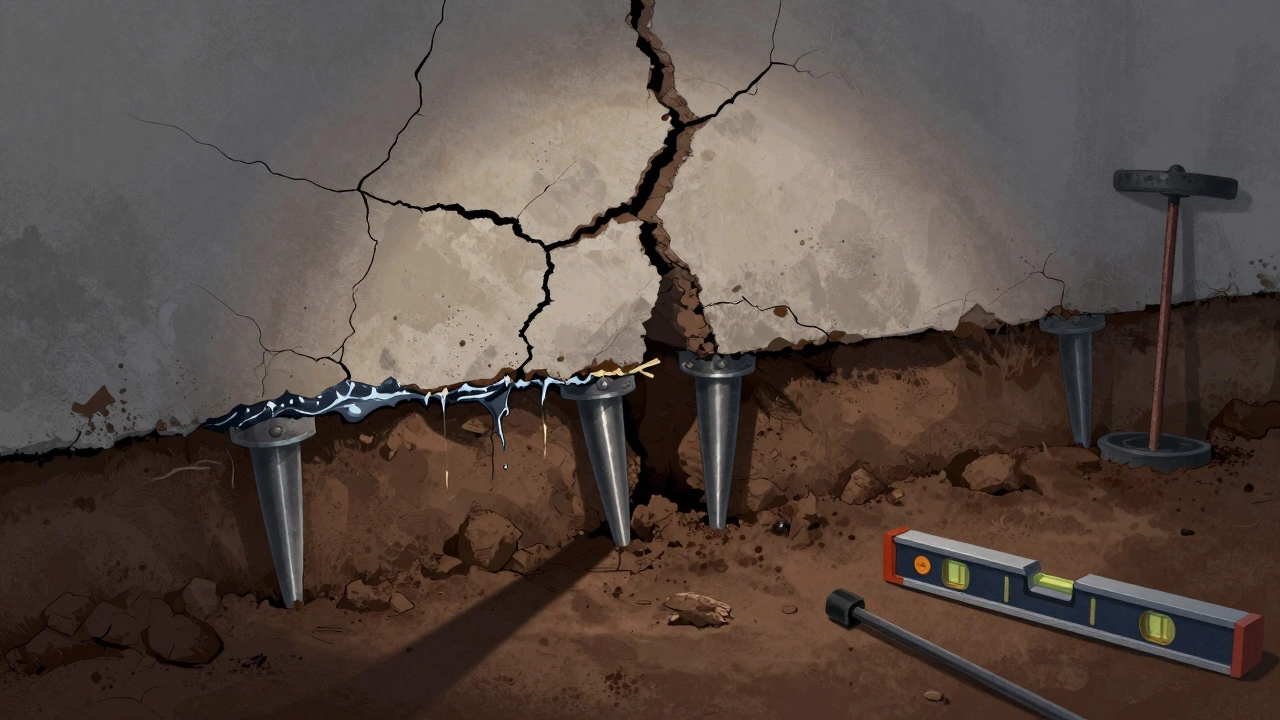
Then they choose a solution:
- Steel piers - Driven deep into stable soil or bedrock. Used when the foundation has sunk. Common in Wellington for homes built on clay.
- Helical piers - Screwed into the ground. Less invasive. Good for lighter structures.
- Slab jacking - Pumping grout under a sunken concrete slab to lift it back up.
- Carbon fiber strips - Bonded to interior walls to stop bowing. Doesn’t fix sinking, but stops further movement.
Most repairs take 1-3 days. Costs range from $2,500 to $15,000 depending on the method and size. It’s expensive, but it’s permanent.
How to Decide: DIY or Pro?
Here’s a simple decision tree:
- Is the crack less than 1/8 inch wide and not growing?
- Are doors/windows still opening and closing smoothly?
- Is the floor flat, or does it slope more than 1 inch over 10 feet?
- Is water leaking into the basement or crawl space?
- Did the crack appear after heavy rain or a landslide warning?
If you answered yes to any of the last three - call a professional. If all answers are no, you can probably seal it yourself.
Still unsure? Take a photo. Measure the crack. Come back in 30 days. If it’s wider, you’ve got movement. Time to call someone.
Prevention Is Cheaper Than Repair
The best foundation repair is the one you never need.
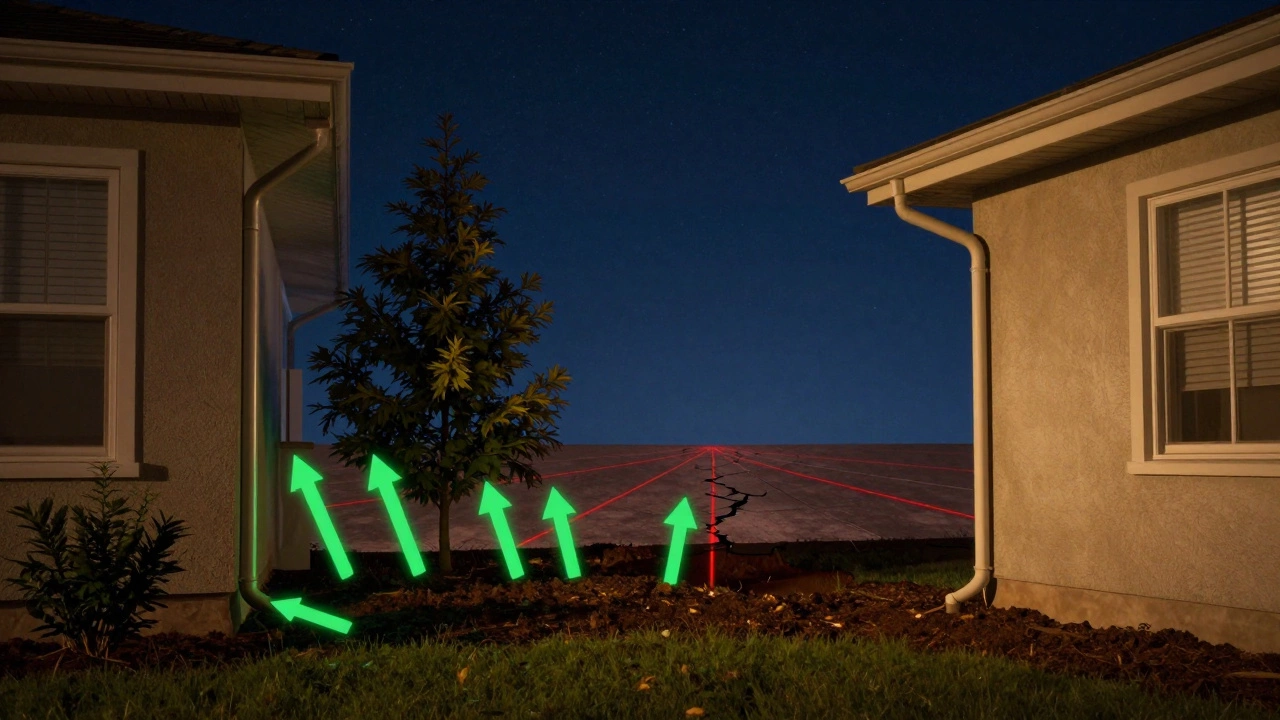
- Keep gutters clean. Flush them twice a year - before winter and after autumn storms.
- Make sure downspouts extend at least 5 feet from the house. Use splash blocks or underground drains.
- Grade the soil so it slopes away from the foundation. At least 1 inch per foot for the first 6 feet.
- Don’t plant trees closer than 10 feet from the foundation. Roots dry out soil and cause settling.
- Check your crawl space every spring. Look for dampness, mold, or rot.
These steps cost less than $200 a year. They can prevent a $10,000 repair.
Frequently Asked Questions
Can I fix a foundation crack with epoxy from the hardware store?
Yes, but only for hairline cracks under 1/8 inch that aren’t moving. Epoxy works well for sealing and stopping water, but it doesn’t add structural strength. If the crack is wider, growing, or accompanied by other signs of movement, epoxy won’t hold. It’s a temporary fix at best.
How do I know if my foundation is sinking or just settling?
Settling happens in the first 1-2 years after construction and is usually even across the house. Sinking is uneven - one corner drops while others stay level. Look for gaps between walls and ceilings, doors that jam on one side, or floors that slope noticeably. Use a level or laser measure. A slope of more than 1 inch over 10 feet means it’s sinking, not settling.
Is foundation repair covered by home insurance in New Zealand?
Generally, no. Most home insurance policies in New Zealand exclude damage from gradual soil movement, poor drainage, or aging foundations. They only cover sudden events like earthquakes, landslides, or burst pipes. If your foundation cracked because of wet soil over years, it’s considered maintenance - not insurance. Always check your policy wording.
Can I wait to fix a small foundation crack?
If it’s truly small and stable, yes - monitor it. Take a photo and measure it every 3 months. But if it’s growing, water is coming in, or you notice new cracks nearby, don’t wait. Foundation damage only gets worse. The longer you wait, the more expensive and invasive the repair becomes.
What’s the most common cause of foundation problems in Wellington?
Soil moisture changes. Wellington has clay-rich soil that expands when wet and shrinks when dry. This causes the ground to push against foundations in winter and pull away in summer. Add poor drainage from clogged gutters or downspouts pointing at the house, and you’ve got the perfect recipe for cracks and shifting.