In What Order Should You Renovate a House? Step-by-Step Guide for 2026
 Mar, 19 2026
Renovating a house isn’t just about picking new paint colors or swapping out cabinets. It’s a complex chain of tasks where one step can break the next if you get the order wrong. Do you start with the kitchen before fixing the roof? What about electrical work before flooring? Getting the sequence wrong doesn’t just cost more-it can ruin months of work. Here’s the real, no-fluff order that actually works in New Zealand homes, based on what’s been done in Wellington, Christchurch, and Dunedin over the last five years.
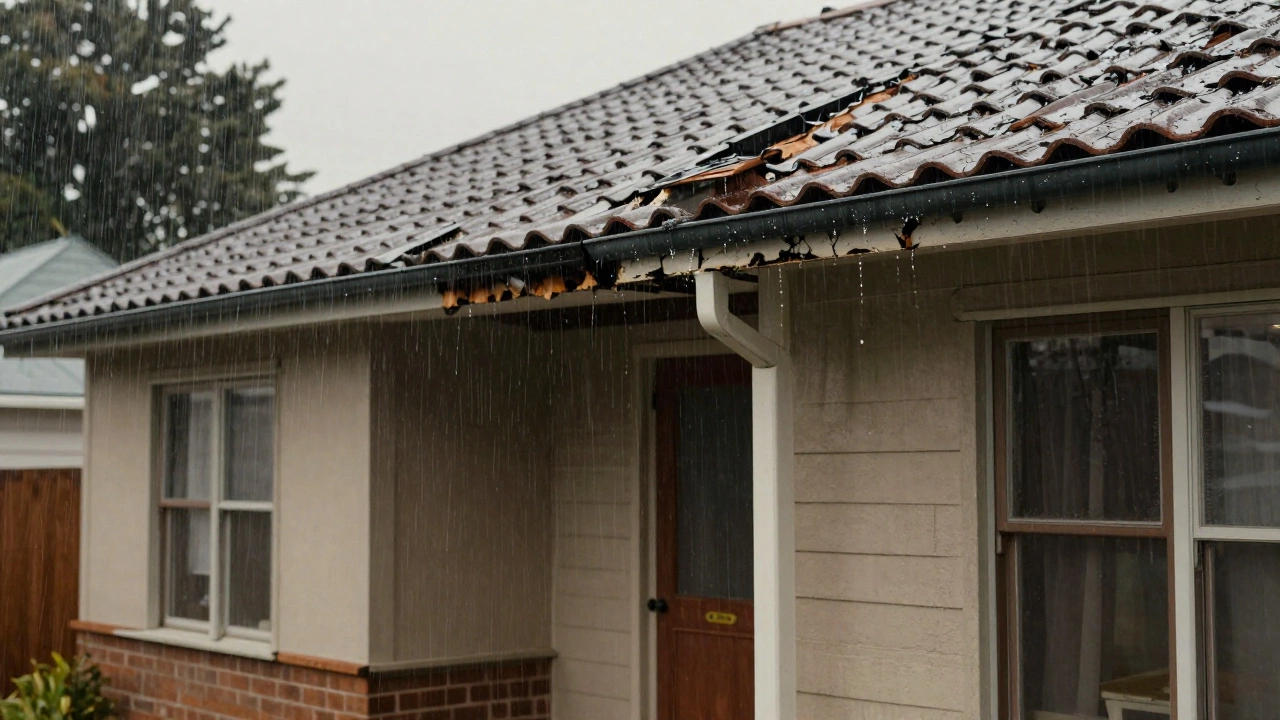
Start with the roof and exterior
Before you even think about interiors, check the shell. Water gets in through leaks, and once it does, it doesn’t just dampen walls-it rotting wood, corroding metal, and wrecking insulation. A 2024 study by the Building Research Association of New Zealand found that 68% of major renovation failures started with an overlooked roof or gutter issue. If your roof is older than 15 years, or if you’ve noticed leaks during winter storms, fix it first. Same goes for siding, windows, and external drainage. Replace cracked or warped cladding. Clean and reseal gutters. Make sure downpipes direct water at least one meter away from the foundation. This isn’t glamorous, but it’s the foundation of everything else.
Address structural and foundation issues
Once the roof is tight, look at what’s holding the house up. In older New Zealand homes-especially those built before 1980-foundation problems are common. Cracked footings, uneven settling, or corroded steel beams can make any interior renovation pointless. You don’t need to rip out the whole house, but you do need to know if the structure is sound. Hire a structural engineer for a quick assessment. They’ll check for:
- Cracks wider than 3mm in concrete slabs
- Wood rot in bearers or joists
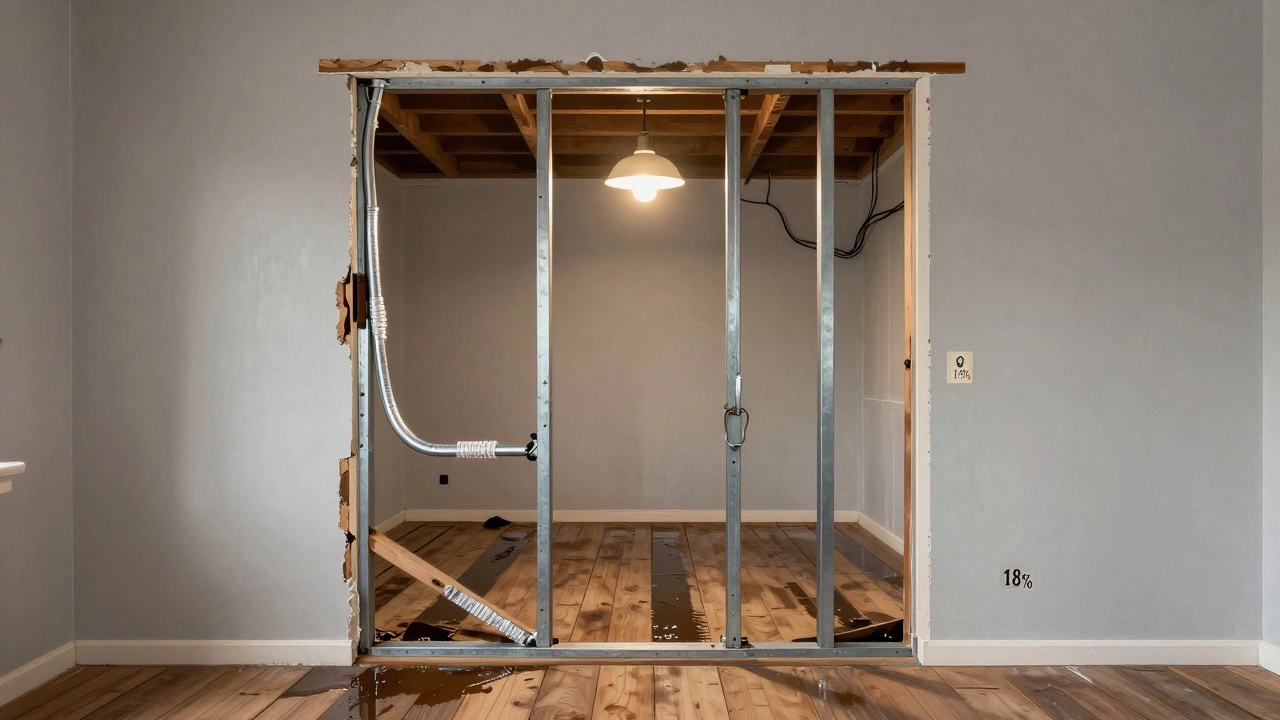
- Moisture levels above 18% in subfloor timber
- Signs of seismic movement in earthquake-prone zones
If any of these are present, fix them before you touch a single wall. No point installing new flooring if the floor is sinking.
Update plumbing and electrical systems
Now that the house is dry and stable, it’s time to look inside the walls. Plumbing and electrical are the veins and nerves of your home. Outdated systems are dangerous and inefficient. Older homes often have:
- Galvanized steel pipes (prone to rust and low flow)
- Aluminum wiring (fire risk)
- 60-amp service panels (can’t handle modern appliances)
- Single-lever faucets with worn cartridges
Replace all pipes with cross-linked polyethylene (PEX) or copper. Upgrade the electrical panel to at least 100 amps, and install RCDs (residual current devices) on every circuit. Do this before drywall goes up. Once walls are closed, you can’t reach the pipes or wires without tearing everything apart again. This is the most expensive part of the renovation-but also the most critical. Skipping it leads to leaks, fires, or power outages later.
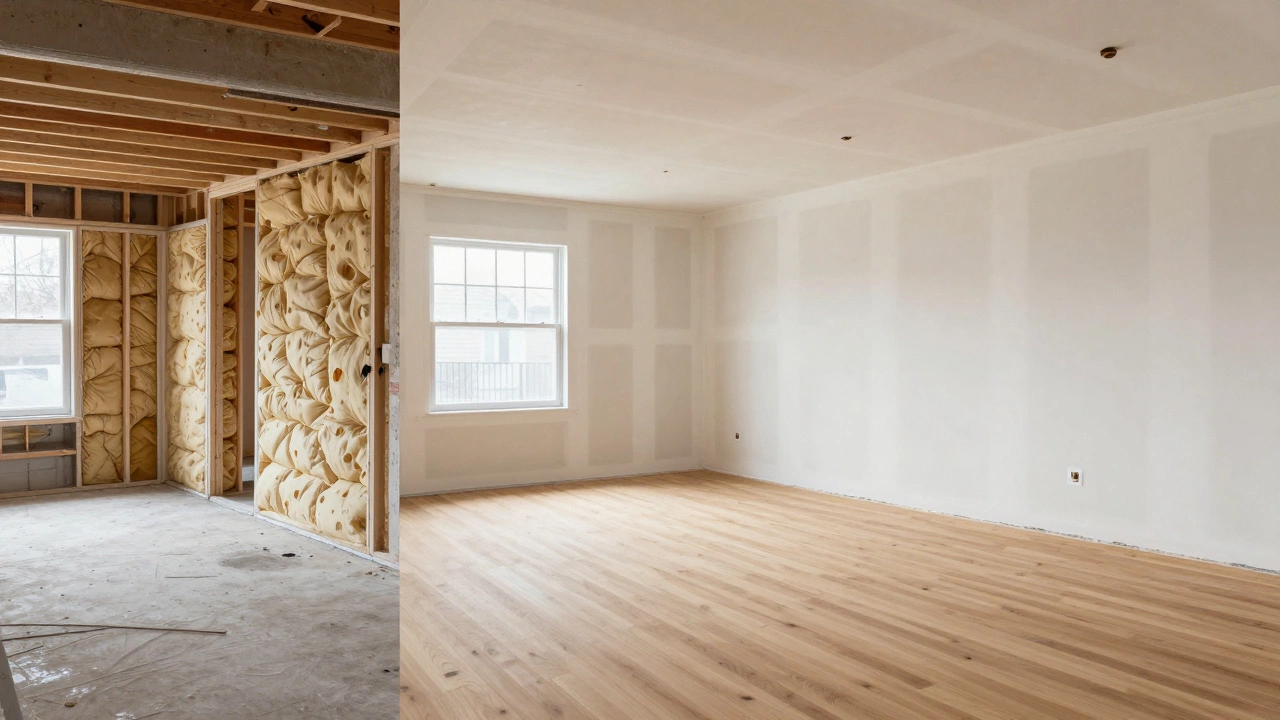
Install insulation and ventilation
After the guts are updated, seal the house properly. New Zealand’s building code now requires R-values of at least R2.6 for walls and R4.0 for ceilings in renovations. Many older homes have none. Adding insulation now is cheaper than doing it later, and it makes a huge difference in heating bills. Use polyester or cellulose insulation in walls and ceilings. Don’t forget the floor-especially if you have a suspended timber floor. Install a vapor barrier under the floor and seal all gaps around pipes and wires. Pair this with a whole-house heat recovery ventilation system (HRV). These systems pull stale air out and bring in fresh air without losing heat. They cut condensation, mold, and stuffiness. In Wellington’s damp climate, this step alone can prevent years of health issues.
Do the drywall and flooring
Now you’re ready for the visible changes. Hang drywall, tape, and finish all interior walls. This is where you’ll see the house start to look like home. But don’t install flooring yet. Why? Because flooring is easily damaged during later work. Sawdust, paint drips, tools dropped from ladders-all of it can ruin hardwood, tiles, or vinyl. Wait until after cabinets, fixtures, and appliances are in place. Install subflooring if needed, but hold off on the final layer. This is also the time to install ceiling lights, ceiling fans, and any built-in cabinetry.
Install kitchens and bathrooms
Kitchens and bathrooms are the most complex rooms to renovate. They involve plumbing, electrical, cabinetry, tiling, and fixtures. Do them together if possible. Start with the rough-in work: move pipes, reroute drains, install new vents. Then tile the floors and walls. Tile first because it’s messy and heavy. Once the tiles are set and grouted, install cabinets and countertops. Finally, add sinks, taps, ovens, and appliances. Don’t install the range hood until the ductwork is fully connected to the outside. Many homeowners skip this and end up with grease buildup in the attic. In New Zealand, building regulations require range hoods to vent outdoors-not into the ceiling space.
Paint, trim, and final finishes
Painting should be the last major step before moving furniture in. Why? Because paint splatters ruin floors, fixtures, and hardware. Paint walls, ceilings, and trim after all other work is done. Use low-VOC paint to keep indoor air quality healthy. Apply two coats for durability. Install baseboards, door casings, and light switch plates. Replace door handles and hinges if they’re worn. This is the stage where you add the personality-new lighting, mirrors, towel rails, and shelving.
Final touches: flooring, furniture, and landscaping
Now you can finally lay the flooring. Hardwood, laminate, tile, or vinyl-install it last. This protects it from damage during earlier stages. Then bring in furniture, rugs, and decor. Don’t rush this part. Take your time arranging things. Test every outlet, faucet, and light switch. Run the HRV for a full week to make sure it’s working smoothly. Check for any squeaks, leaks, or rattles. Fix them now while you still have access.
Don’t forget the outside. Landscaping comes after the house is done. Move soil, plant trees, lay pathways. Installing a garden before the roof is fixed? Bad idea. Rain can wash away topsoil. Installing a deck before the house is painted? You’ll get paint on the wood. Wait until everything inside is sealed and clean.
Common mistakes to avoid
- Starting with the kitchen: You’ll end up with water damage from plumbing leaks or dust everywhere from demo work.
- Buying furniture too early: You might not have enough space, or the layout might change.
- Ignoring ventilation: Mold grows fast in poorly ventilated homes. It’s not just ugly-it’s expensive to remove.
- Skipping permits: In New Zealand, any structural or plumbing work requires a building consent. Do it right or face fines and forced removals.
Typical timeline for a full home renovation
Here’s what a realistic schedule looks like for a standard 3-bedroom, 1970s home:
- Roof and exterior repairs: 2-4 weeks
- Foundation and structural fixes: 3-6 weeks
- Plumbing and electrical: 4-6 weeks
- Insulation and ventilation: 2 weeks
- Drywall and ceilings: 3 weeks
- Kitchen and bathrooms: 6-8 weeks
- Painting and trim: 2 weeks
- Flooring and final touches: 2 weeks
Total: 3-4 months. Rushing it? You’ll pay double in repairs later.
Can I renovate my house room by room without following this order?
Technically, yes-but it’s risky. If you renovate a bathroom before fixing the roof, you could end up with water damage behind the tiles. If you install flooring before upgrading the electrical system, you’ll have to pull it up again when you rewire. Room-by-room renovations work only if each room is completely isolated and you’re not touching shared systems like plumbing or structural supports. Most homeowners find it cheaper and less stressful to do it all in one go, in the right order.
What if I’m on a tight budget and can’t do everything at once?
Focus on safety first: roof, foundation, plumbing, and electrical. These are non-negotiable. Then add insulation. These steps protect your home from long-term damage. After that, you can phase in the cosmetic upgrades-paint, flooring, cabinets-over months or even years. Many New Zealanders do this. They live in one part of the house while renovating the other. It’s slower, but it spreads out the cost and avoids massive debt.
Do I need to hire professionals for every step?
For structural, plumbing, and electrical work-yes. These require licensed tradespeople under New Zealand law. You can do drywall, painting, and tiling yourself if you have experience. But if you’re unsure, hire a project manager. They’ll coordinate trades, get permits, and keep the timeline on track. A good project manager saves you 20-30% in wasted time and materials.
How do I know if my house needs a full renovation or just a refresh?
Look at the basics: Is the roof leaking? Are walls damp? Do outlets spark? Is the heating bill over $1,200 a year for a 3-bedroom home? If yes to any of these, you need structural work. A refresh is just changing paint, fixtures, or flooring. If your home is over 40 years old and hasn’t had major upgrades since the 1990s, you’re likely overdue for a full renovation. Don’t be fooled by cosmetic fixes-they won’t fix rot or outdated wiring.
What’s the biggest cost killer in home renovations?
Change orders. People start with one plan, then decide halfway through to move a wall, add a window, or switch from tile to timber flooring. Each change means tearing out work that’s already done. The average homeowner spends 25% more because of last-minute changes. Stick to your plan. Get quotes upfront. Lock in materials before you start. That’s how you avoid budget blowouts.