What is the cheapest way to extend a house? Budget-friendly house extension ideas
 Dec, 28 2025
House Extension Cost Calculator
Enter your extension details to see estimated costs.
Note: Costs are estimates based on Wellington market rates as described in the article. Actual costs may vary based on your specific location, council requirements, and builder.
Extending your house doesn’t have to cost tens of thousands of dollars. In Wellington, where land is tight and property values keep climbing, many homeowners are looking for smart, affordable ways to add space without breaking the bank. The cheapest way to extend a house isn’t about cutting corners-it’s about choosing the right strategy from the start.
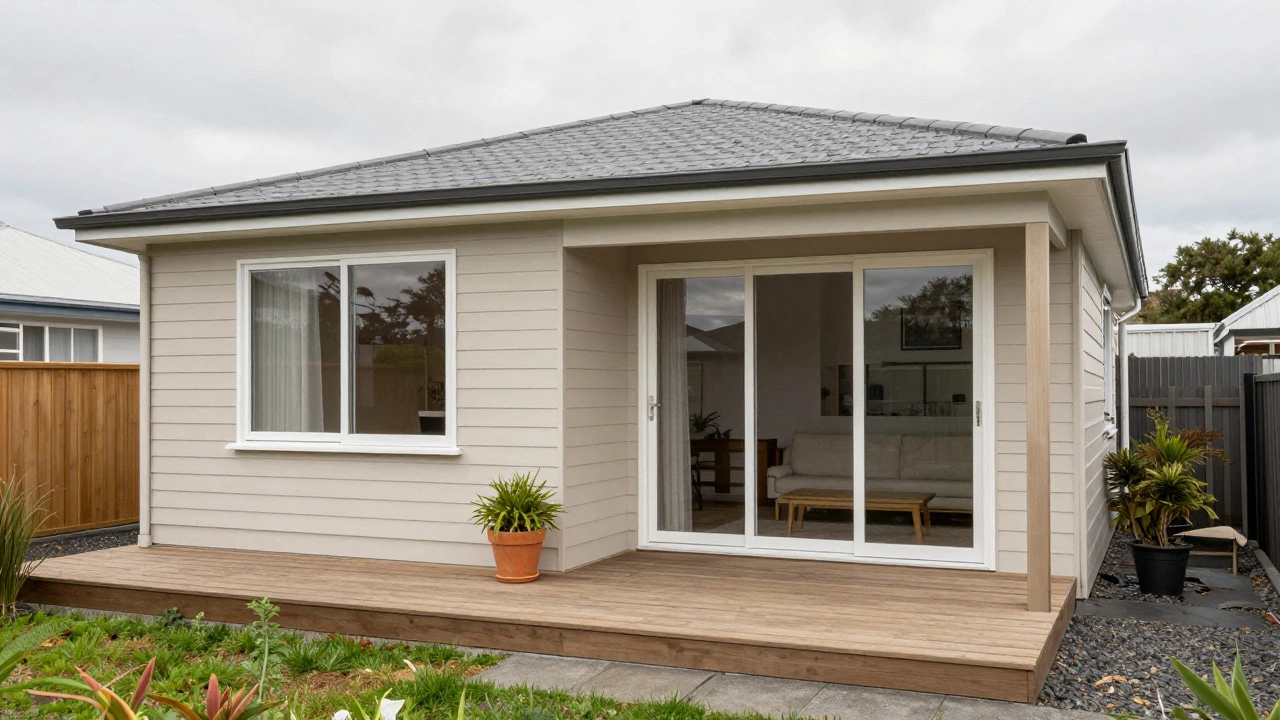
Start with a single-storey rear extension
The most cost-effective house extension in New Zealand is usually a single-storey addition at the back of the home. Why? Because it avoids the complexity and expense of adding another floor. You don’t need to reinforce the foundation for extra weight, you don’t need complex staircases, and you can often tie into existing rooflines and plumbing.
A basic 4m x 5m rear extension (20m²) in Wellington typically costs between $45,000 and $65,000 if done with standard materials and no fancy finishes. Compare that to a two-storey addition, which can easily hit $120,000+. The rear extension also avoids disturbing the front of your home, which means less disruption to neighbours and fewer council restrictions.
Many homeowners use this space for a new kitchen, dining area, or living room. It’s the perfect way to open up your home without losing your backyard. If you already have a deck or patio at the back, you can even extend the flooring directly into the new room to make it feel seamless.
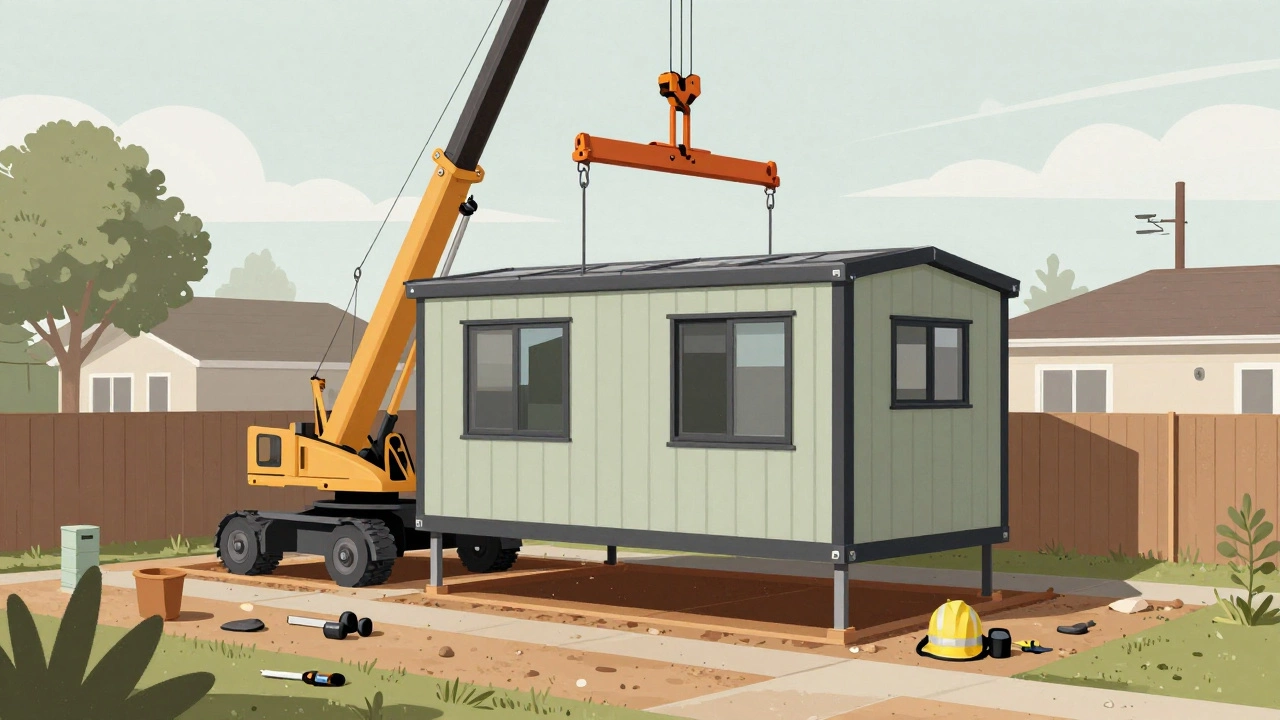
Use a kit home or prefabricated module
Instead of hiring a builder to construct everything from scratch, consider a prefabricated extension. Companies like PrefabNZ a New Zealand-based provider of modular home extensions and Kit Homes NZ offers pre-designed, factory-built home additions sell ready-made extensions that you can install in days.
These kits come with walls, roof, windows, and sometimes even flooring and insulation already installed. You still need a builder to lay the foundation, connect utilities, and finish the interior, but the bulk of the labour is done off-site. This cuts construction time by 50-70% and reduces labour costs significantly.
A typical 15m² prefab extension in Wellington runs from $30,000 to $50,000 installed. That’s $15,000-$20,000 cheaper than a traditional build. Some kits even include solar-ready roofs and energy-efficient windows, which save money on power bills later.
Build over an existing garage or carport
If you’ve got a detached garage or carport, you’re sitting on a goldmine. Converting it into a living space is one of the cheapest ways to add square footage. You’re not starting from zero-you already have a foundation, a roof, and often electricity and water lines nearby.
A common approach is to remove the garage door, reinforce the frame, add insulation, windows, and drywall, then turn it into a bedroom, study, or guest suite. In Wellington, this kind of conversion usually costs between $35,000 and $55,000. That’s a fraction of the price of building a new room from the ground up.
Pro tip: Make sure the existing structure meets current building codes. A lot of older garages were built with lightweight timber frames that can’t support a living space. A structural engineer can check this for under $500.
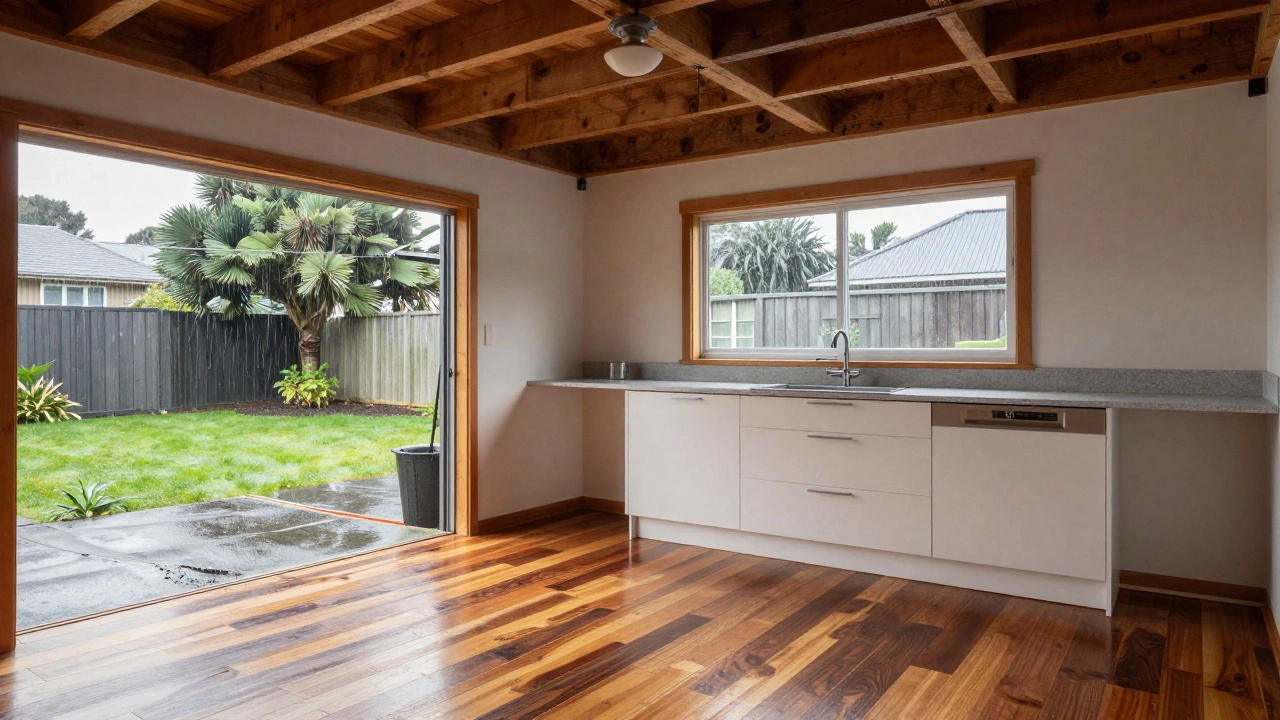
Go simple on finishes
One of the biggest budget killers in home extensions isn’t the structure-it’s the finishes. You don’t need marble countertops, engineered oak flooring, or custom cabinetry to make a space feel good.
Here’s what works in Wellington homes:
- Use laminate or vinyl plank flooring instead of solid timber
- Choose standard kitchen cabinetry from Bunnings or Mitre 10 instead of bespoke joinery
- Install basic tile in bathrooms instead of natural stone
- Paint walls white or light grey-no feature walls needed
- Use standard double-glazed windows instead of custom shapes or frames
These choices can cut your finish costs by 30-40%. A $100,000 extension can become a $65,000 one just by choosing practical over premium.
Do the demolition and site prep yourself
Labour is the biggest part of any construction budget. If you’re handy with tools, you can save thousands by doing the messy, physical work yourself.
Tasks you can handle:
- Removing old sheds, fences, or overgrown plants from the extension site
- Clearing debris and hauling it to the dump
- Preparing the ground for the foundation (leveling, digging trenches for footings)
- Painting or sealing surfaces after the build
One homeowner in Karori saved $12,000 by doing all the demolition and site cleanup himself. He hired a builder only for the structural work and finishing. That’s not risky-it’s smart. Just make sure you’re not touching gas, electrical, or plumbing lines unless you’re licensed.
Work with a small local builder, not a big firm
Big construction companies charge more because they have overheads: marketing, office staff, insurance, and profit margins. A small local builder in Wellington, especially one who’s been around for 10+ years, often charges 20-30% less.
Ask for references. Look for builders who specialize in extensions-not new builds. They know how to work around existing structures, manage utility connections, and avoid surprises. Check the Master Builders Association a trusted industry body for vetted builders in New Zealand directory for local members with good reviews.
Get at least three quotes. Don’t just pick the lowest. Look for the one with the clearest breakdown of costs. Watch out for quotes that say "TBC" (to be confirmed) for things like drainage or insulation-that’s where hidden costs creep in.
Use existing materials where you can
Salvaged materials are a hidden gem. Reclaimed bricks, old timber beams, second-hand windows, and even doors from demolition sites can look amazing and cost a fraction of new ones.
In Wellington, places like Re-use Centre Wellington a local reuse and recycling hub for building materials and Salvage & Reuse a supplier of reclaimed timber and fixtures in the lower North Island have stock you can browse for under $1,000.
One couple in Newtown used salvaged kauri floorboards from a 1920s house for their extension. The wood had character, history, and cost 70% less than new timber. They also used old French doors from a demolition site as a sliding door to the backyard.
Plan for weather and insulation from day one
Wellington is windy. Cold. Wet. If you skimp on insulation or use poor-quality windows, you’ll pay for it in heating bills every winter. The cheapest extension becomes expensive fast if it’s uncomfortable.
Minimum standards in New Zealand require R-2.6 insulation in walls and R-3.5 in ceilings. But for a real comfort boost, go for R-3.5 in walls and R-5.0 in ceilings. That adds maybe $2,000 to $3,000 upfront-but saves $500-$800 a year on heating.
Double-glazed windows are non-negotiable. Single-glazed in Wellington? You’ll feel drafts even in summer. Stick with aluminium-clad timber or uPVC frames with low-e glass. They’re worth the extra cost.
Know the rules before you start
Building without consent can cost you more than building with it. Wellington City Council requires building consent for any extension over 10m². Even if your extension is small, you still need to meet the Building Code for safety, insulation, and drainage.
Also, check your resource consent rules. Some suburbs have height limits, setback requirements, or restrictions on how much of your yard you can build on. A $500 consultation with a local building consultant can save you from a $20,000 demolition later.
Don’t assume your neighbour’s extension is legal. Just because they did it doesn’t mean you can too. Council records are public-you can look them up online.
What not to do
Here are the top three mistakes people make when trying to extend cheaply:
- Skipping the structural engineer. A weak foundation or poor framing leads to cracks, leaks, and expensive fixes later.
- Trying to DIY plumbing or electrical. It’s illegal in New Zealand without a licence, and it voids your home insurance.
- Choosing the cheapest materials without thinking long-term. Cheap windows leak. Cheap insulation attracts mould. You’ll pay more in repairs than you saved.
Real example: A $52,000 extension in Hataitai
A couple in Hataitai wanted a bigger kitchen and living area. They didn’t want to move. Their solution:
- 20m² rear extension using a prefab kit ($38,000)
- DIY demolition and site prep ($4,000 in saved labour)
- Salvaged timber flooring from Re-use Centre ($1,200)
- Standard kitchen cabinets and laminate countertops ($6,000)
- Double-glazed windows and R-3.5 insulation ($2,800)
Total: $52,000. No permits denied. No delays. No surprises. They added 20 square metres of usable space, increased their home’s value by $80,000, and now have a warm, bright space they love.
Final thought: Cheap doesn’t mean bad
The cheapest way to extend a house isn’t about being lazy-it’s about being smart. It’s choosing the right design, the right materials, and the right people. It’s knowing what to spend on and what to save on.
In Wellington, where every square metre counts, a well-planned, budget-friendly extension can transform your home without draining your savings. Start with your existing space. Think simple. Build smart. And don’t rush the planning-because the best extensions are the ones you don’t regret later.
What’s the cheapest type of house extension in New Zealand?
The cheapest house extension in New Zealand is typically a single-storey rear addition using a prefab kit or basic timber frame. These avoid the high costs of multi-storey builds, complex foundations, and stairs. In Wellington, a 20m² rear extension can cost as little as $45,000-$65,000 when done with standard materials and smart choices.
Can I extend my house without council approval?
No. In Wellington, any extension over 10m² requires a building consent. Even smaller projects must meet the Building Code for insulation, safety, and drainage. Building without consent can lead to fines, forced removal, or problems when you sell. Always check with your local council before starting.
Is a prefab extension worth it?
Yes, if you want speed and cost savings. Prefab extensions are built in factories, so they’re precise, weather-protected, and faster to install. They often come with insulation, windows, and cladding already installed. In Wellington, they’re a popular choice for rear additions and can save 20-30% compared to traditional builds.
How much does it cost to extend a house by 20 square metres?
In Wellington, a 20m² extension costs between $45,000 and $80,000, depending on materials, finishes, and whether you use a prefab kit or custom build. Budget builds with standard finishes start around $45,000. High-end finishes with custom joinery and premium windows can push it to $80,000 or more.
Can I build over my garage to save money?
Yes, and it’s one of the smartest ways to extend cheaply. If your garage is structurally sound, converting it into a living space avoids the cost of building a new foundation. Costs range from $35,000 to $55,000. Always get a structural engineer to check the existing frame before starting.